
LASER CUTTING EASTER BUNNY PROJECT
MATERIALS NEEDED
- 3mm thick cast acrylic sheets in PINK, GREY and WHITE (Available here)
- Adhesive film (call our team on 1300 20 15 10 to order)
- Laser engraver (we suggest a CO2 laser such as any from the Epilog range)
- Graphic design software (we run CorelDraw classes throughout the year)
STEP 1: PREPARE ACRYLIC
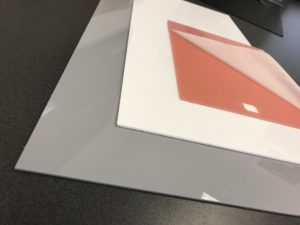
Preapply adhesive to the back of the pink and white acrylic sheets. Once they are cut, we will peel off the adhesive backing to stick it onto the grey base.
STEP 2: OPEN THE EASTER BUNNY DESIGN FILE
We’ve prepared artwork files for you to download and get started! Click here to download the Easter Bunny files in CorelDRAW!

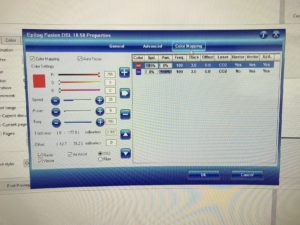
STEP 3: COLOUR MAPPING
Use colour mapping to set up cutting and marking lines for this project. In our example pictured, we have used RED lines for making vector marks and BLUE lines for laser cutting.
Here are the settings we used:
We can assist you in setting up your design at our Alfex Laser University open days in Melbourne and Brisbane, too!
STEP 4: RUN THE JOB FOR EACH OF THE ACRYLIC SHEETS
Watch our video tutorial to see how your marks and cuts should turn out…
STEP 5: ASSEMBLE THE BUNNY
Now that you have the grey base and the pink and white facial features all cutout, its time to put it all together.
Peel the adhesive off the back of the white pieces and start sticking them on carefully to the grey base. Then do the same with the pink tongue, nose and ears pieces.